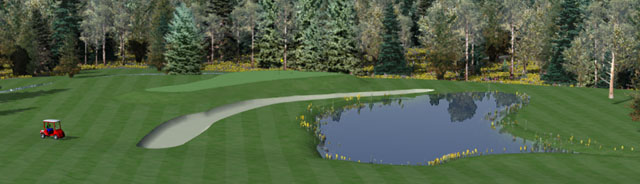
 Animation and Real-time Interaction with NatureView Express Animation is a series of rendered frames assembled to create a video. This is high-quality output that can be used for web, television, DVD, and kiosk delivery. Click the image below to view the movie. Download Movie: MP4 (4 MB) | Ogg (14 MB) | WebM (5 MB)
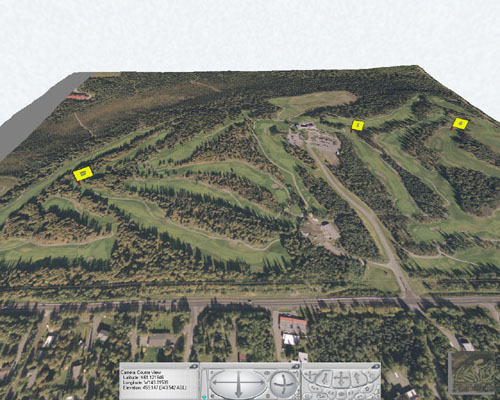 1. Download and extract the latest version of 3D Nature's NatureView Express viewer (1.6 MB). 2. Download the scene file (9.8 MB). You don't have to extract it; NatureView Express will do that for you. 3. Launch NatureViewExpress.exe from the 3D Nature download. An Open NatureView Scene File window will open. 4. Navigate to the demo.zip scene file you downloaded and Open. Navigation instructions appear in the opening screen and additional help can be accessed with the h key. Navigating the Scene The scene opens with an overview looking north across the site. Use the n key to fly to the next viewpoint or camera view. If you know which view you want by name, right-click anywhere in the viewer to open the pop-up menu, hold your mouse over Viewpoints, and select a camera. The arrow in front of the Tour 1, Tour 4, and Tour 17 viewpoints indicates an animated camera. 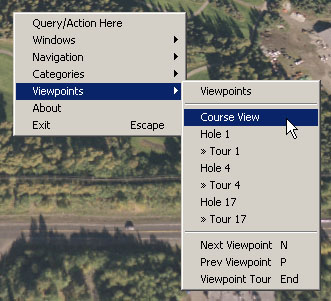 Viewpoints in the pop-up menu Like any real-time environment, navigation takes getting used to. How you do it depends on what you're most comfortable with. The easiest way to get started is to left-click and drag your mouse in the view and see what happens. The center of the viewer is the safe zone; nothing happens when you click there. Click above the center to fly forward and click below to fly backward. The greater your mouse distance from the center the faster you'll fly in that direction. Flight will continue as long as the left mouse button is depressed. If you get lost use the spacebar to return to the starting camera location. The left Navigation Disk in the Drive Window accomplishes the same movement.  Drive Window with Navigation Disk (left) and Rotation Disk (right) To look around in one location, hold the Ctrl key down while depressing the left mouse button. Once again, the center of the viewer is the do-nothing zone. The farther you move your mouse from the center, the faster you turn in that direction. The right Rotation Disk in the Drive Window causes the same movement. Use the spacebar to return to the starting camera location. To change your elevation while remaining in one location, hold down the Shift key while depressing the left mouse button. Up from center raises the view and down from center lowers it. |
Copyright 2004, 2010, 2015 R Scott Cherba All Rights Reserved
Updated 16 November 2015